Notebooks are a common tool among data scientists - many data professionals write all their code in notebooks.
Jupyter Lab is a web application used by data scientists to run Jupyter Notebooks. Historically the only way to work with notebooks was using Jupyter Notebook - in 2017 we were given Jupyter Lab.
Jupyter Lab offers a superior development experience to Jupyter Notebook, with improvements such as:
This post is aimed at showing off what Jupyter Lab can do.
Install without a space:
$ pip install jupyterlabStart a server with a space:
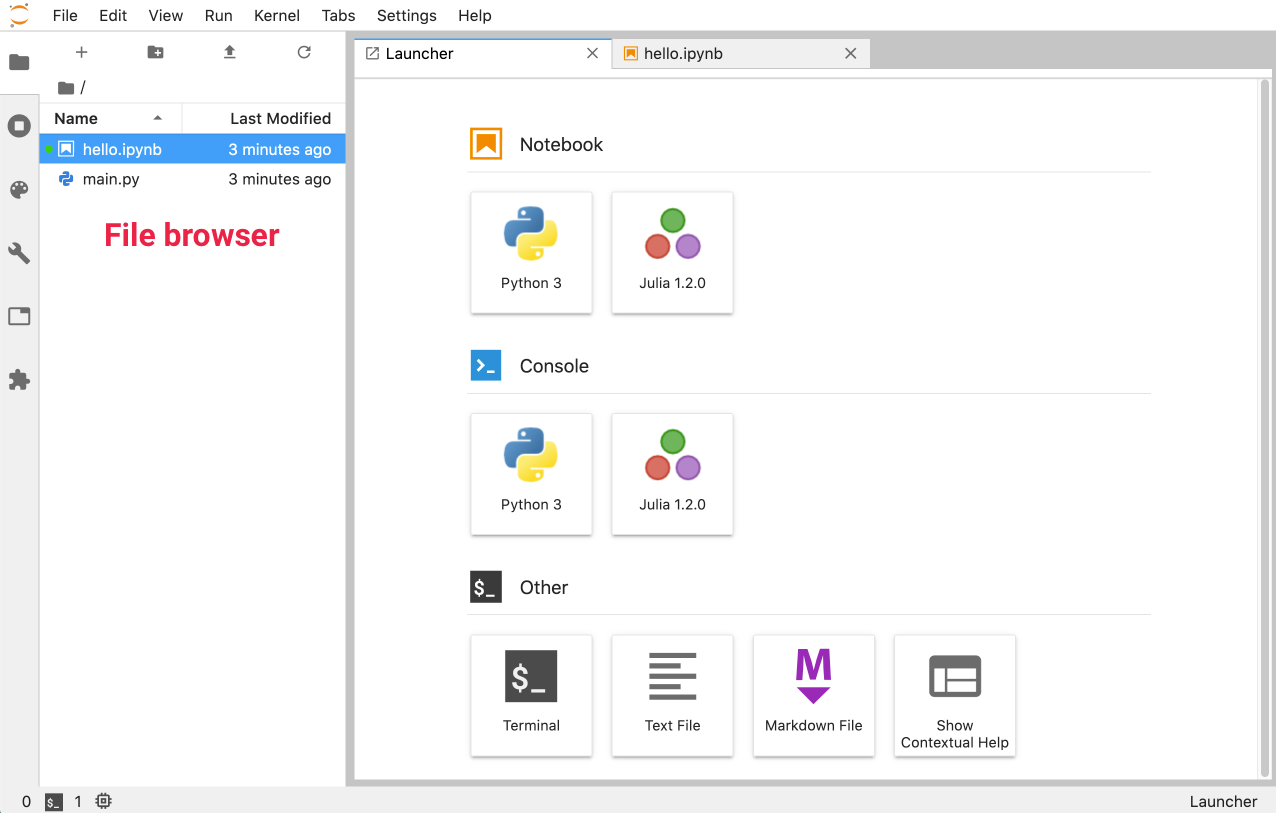
$ jupyter labYou can then point your browser to http://localhost:8888/lab, and you’ll see the Launcher screen, shown below with the File Browser open in the sidebar:
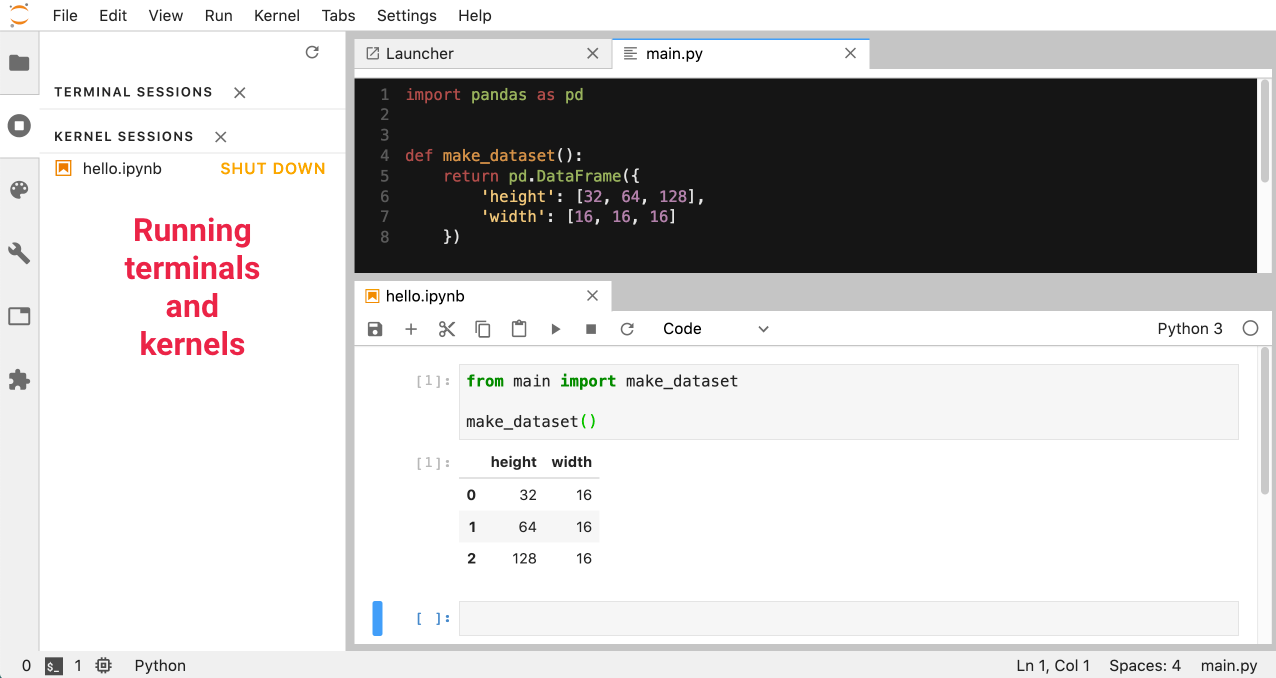
Unlike Jupyter Notebook, you can have multiple tabs open side by side - you can also keep track of your kernels by selecting Running Terminals & Kernels in the sidebar:
Something that can be confusing is the difference between the .ipynb notebook file, Jupyter Notebook & Jupyter Lab:
.ipynb) is a JSON text file that defines the structure & code of a notebookBoth Jupyter Notebook & Jupyter Lab can be used to run any .ipynb notebook file.
Another area for confusion is what exactly a kernel is. A kernel is just a running Python interpreter, usually connected to a notebook. It is possible swap kernels after they are running, but it’s not something we do a lot.
Kernels can be managed from the menu bar - restarting kernels is something that is done a lot. Unfortunately there are no default shortcuts setup for kernel management - see our post on Customizing Jupyter Lab Shortcuts to see how to set these up.
In order to control which virtual environment you are using in the notebook, it’s best to activate the environment before you install Jupyter Lab or start the server. For example, if you are using conda to manage virtual environments:
$ conda activate base
$ jupyter lab
You’ll also want to make sure you activated this environment before installing Jupyter Lab.
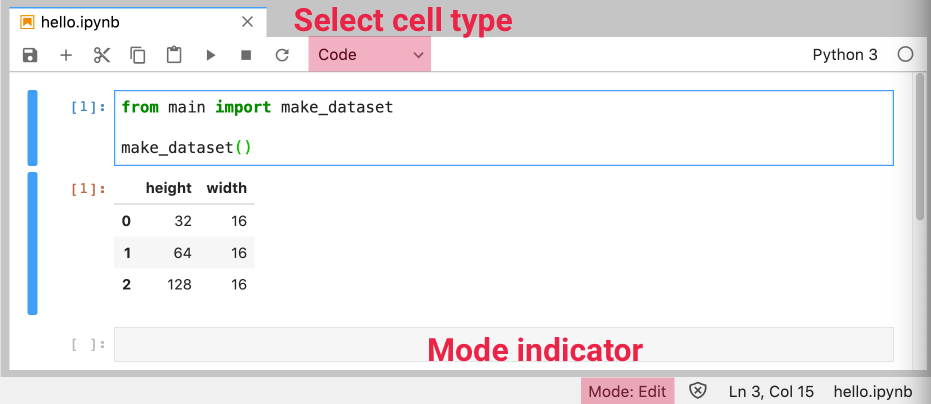
When editing notebooks, Jupyter Lab becomes a modal editor with two modes - Command and Edit:
A modal editor will operate differently depending on the mode - the same key will do different things based on what mode you are in. You can see what mode you are in on the status bar.
You can move between modes using:
Enter to move from Command Mode to Edit ModeEscape to move from Edit Mode to Command ModeCells can be run using Shift Enter in either mode, ending up in Command Mode.
A notebook is composed of cells - blocks that contain text. The text inside a cell can either be code, Markdown or raw text. The ability to have mix executable code and Markdown documentation is a key feature of notebooks.
You can change the cell type using a dropdown:
You can change cell types using the following shortcuts in Command mode:
m = change cell to Markdowny = change cell to codeThree other useful Command Mode shortcuts for operating on cells are:
a = insert cell aboveb = insert cell belowdd = delete cellMastering these five shortcuts will allow you to work with cells as efficiently as you work with text.
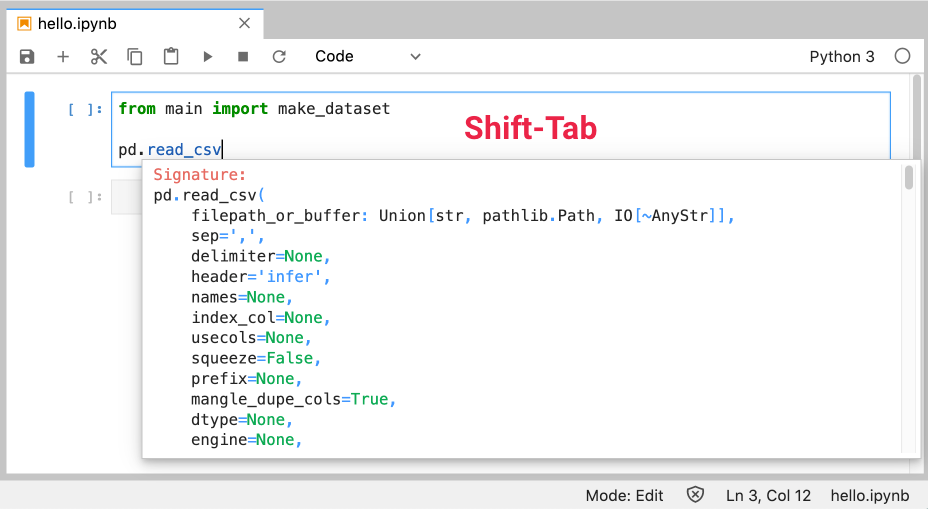
Pressing Shift-Tab will show a tooltip for the function or class your cursor is on:
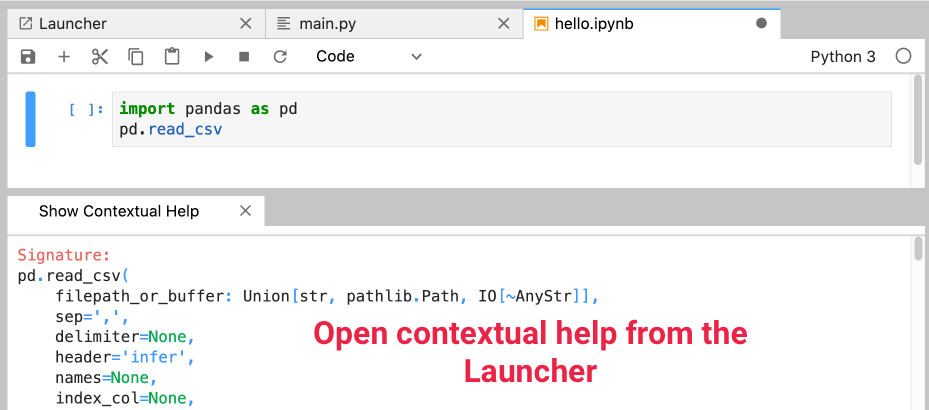
Similar to the tooltip, except it’s always there. You can have this help always shown in a separate pane by opening a Show Contextual Help window from the Launcher:
Consoles are another way to interact with a running kernel - a cool trick is to connect a console to a Python script (.py):

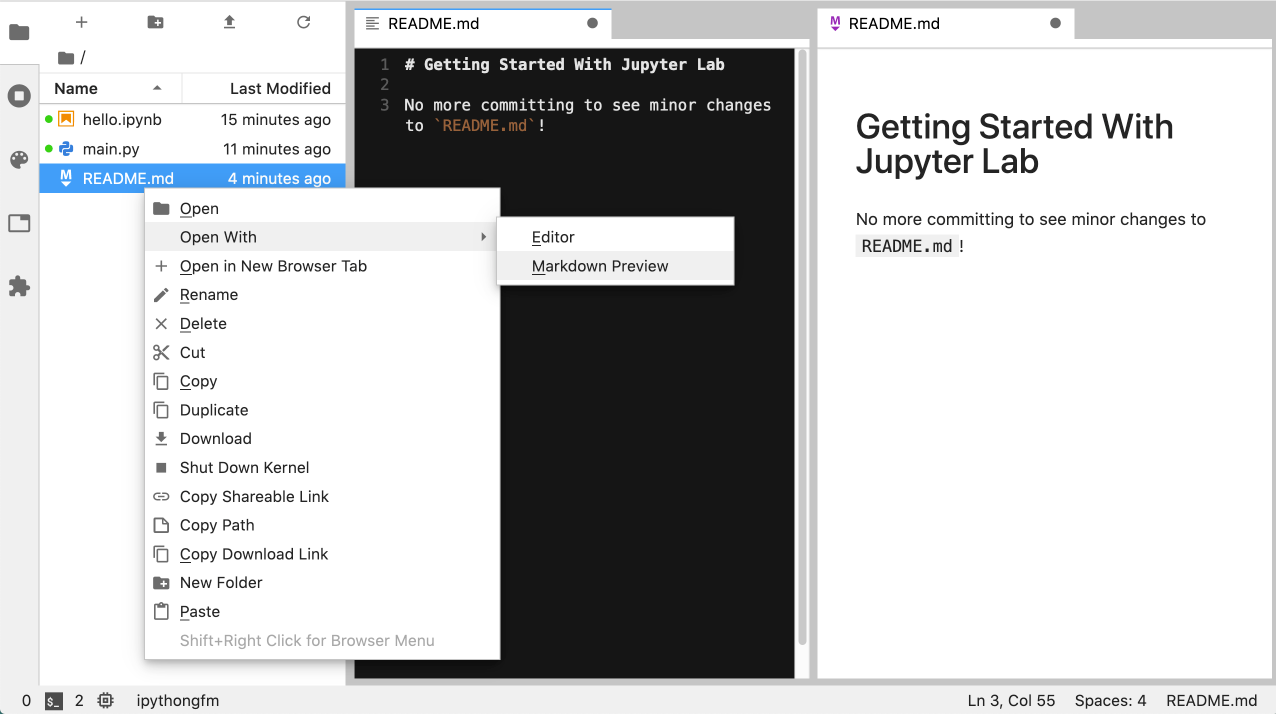
No more committing README.md changes just to see the updates:
? and ??These are actually iPython features, and will also work in an iPython kernel:
? to see the docstring?? to see the source code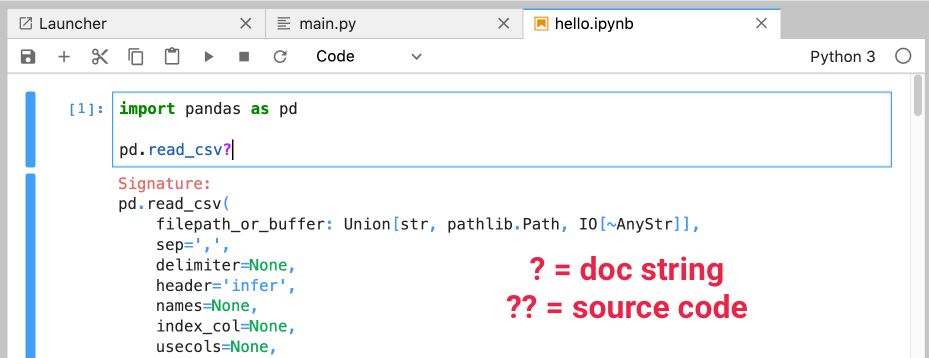
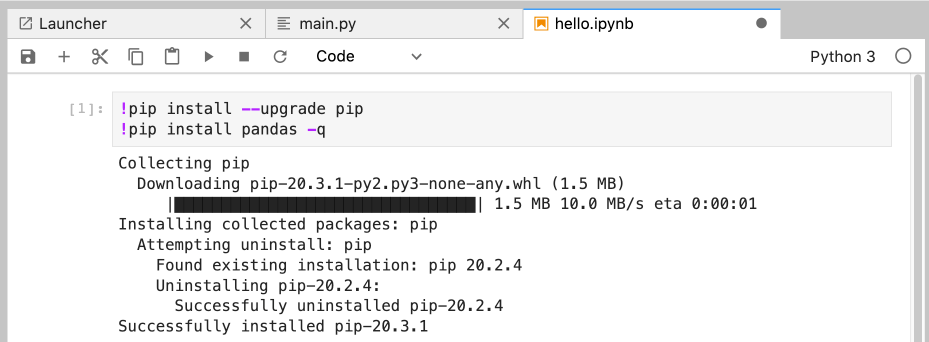
Another iPython feature - running shell commands inside a notebook:
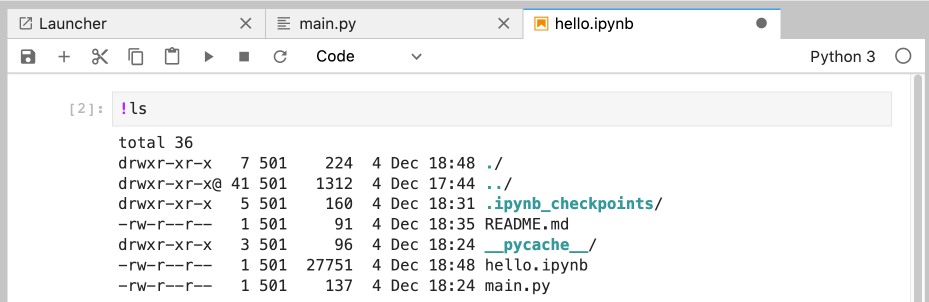
You can use this to automatically install packages in the first cell of a notebook - make sure to use the -q flag to hide the output:
%%autoreloadAutoreload helps deal with problem of source code outside the notebook not being reimported when it’s changed. This is only a problem when the source code changes after you start the kernel - essentially only when you are writing code yourself, external to the notebook.
Putting these two commands at the top of your notebook will mean that if you make changes to source code outside of the notebook, you can get these changes without having to restart the kernel.
%load_ext autoreload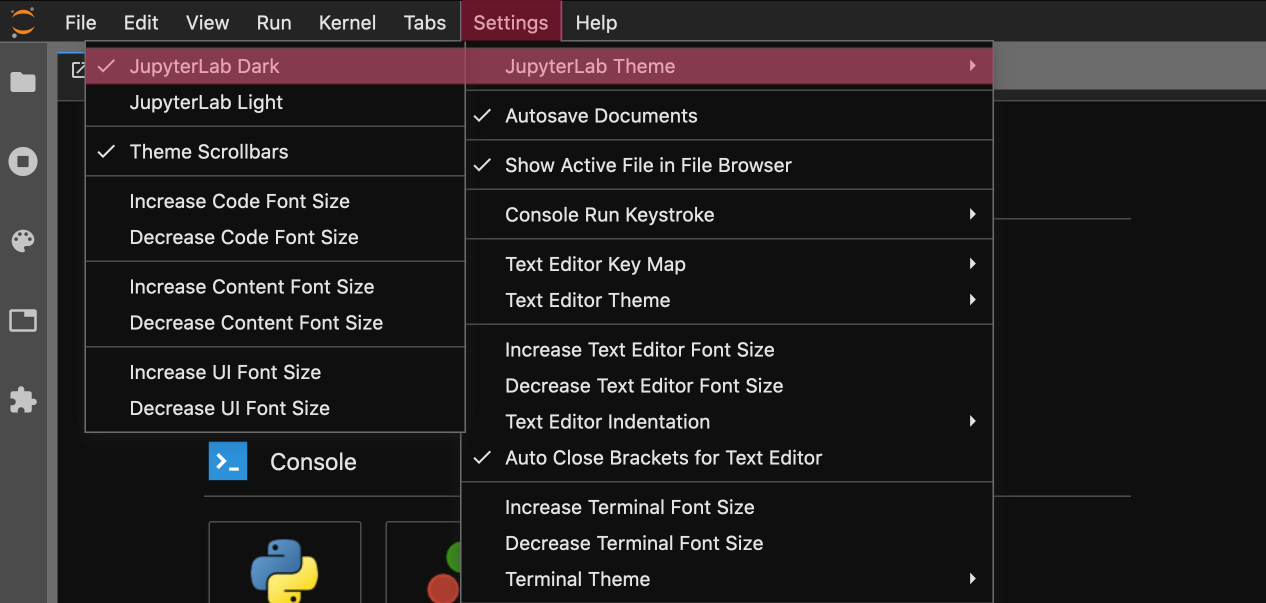
%autoreload 2The most important tip of all - a dark theme:
Below is a list of the most useful keyboard shortcuts in Jupyter Lab:
Cmd B = toggle sidebarAlt W = close tabEnter= to move from Command to EditEscape = to move from Edit to CommandShift Enter = run cella = insert cell above
b = insert cell below
dd = delete cell
z = undo cell
shift z = redo cell
m = change cell to Markdown
y = change cell to code
Cmd Z = undo textShift Cmd Z = redo text